


Running the GUI Toolkit
To open the toolkit, run:
$DP_INSTALLPATH/bin/toolkitA window should appear that looks similar to this:
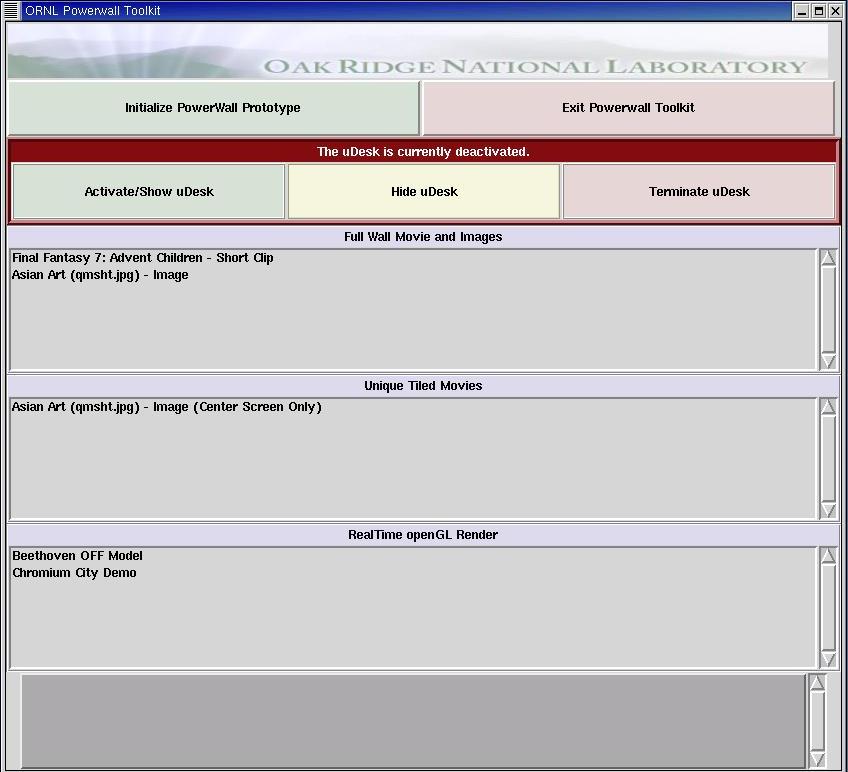
The top row contains two buttons:
Initialization: This is not necessary at this time.
Exit: Press this button when you are ready to quit the program.
The next row of buttons deals with the "uDesk":
Activiation: This button starts a usable desktop on the Powerwall using DMX. The desktop contains only a large xterm at activiation, so you may want to run a 'gnome-session' for full desktop support.
Hide: Currently unsupported.
Terminate: Kills the DMX session.
The center of the program contains three menus with Movies, Images, and Realtime demos. To view a selection, simply double-click the one you wish to view. The first menu contains Images and Movies that take up the whole Powerwall. The second menu is for uniquely tiled demos, such as only using the center screen. The last menu is for fullscreen Realtime OpenGL demos, some of which load geometric objects.
All of the demos use Chromium, with some help from Pixel Blaster, to display.
Upon menu selection, a small 400x400 window with "boba142:0" in the center will appear--this is the program 'x2x'. The window allows the user to send keyboard commands to the running demo since their is no direct keyboard attached to boba142. To send key commands, simply click on the window and all key commands will be sent to boba142. To resume keyboard control on the local machine, hit the left and right mouse buttons simultaneously. It is very important that demos be quit via the keyboard, or allowing the movie to run through. Killing the processes incorrectly may result in hidden processes that will prevent future demos from running. To quit Chromium, send boba142 the "q" key.
The bottom of the program displays text messages about the Toolkit's operations.